
Artists from the Paper Artist Collective were given a brief to create paper models of London landmarks for a private event. The results are colourful, offbeat, and animated.
1. Maria Cruz’s Oxo Tower
Cruz is a paper artist and set designer. She chose the Oxo Tower because she wanted to build a less recognised landmark to make her own. The Oxo Tower forms part of a former meat stock cold store, and there’s an urban legend that you can trade oxo cube wrappers (of cooking stock) for a free cocktail at the tower’s restaurant/bar.
Tools Used: blade, ruler, glue, light structure, cardboard structure and tape.

Process: The whole process took me 3 days. I started with a little sketch and later I used the computer to create templates to speed up the process. After printing the designs I hand cut the shapes with a blade and a ruler. I built a couple rough (functional) versions first to ensure the light structure could fit inside the building before starting the final piece.
Most challenging part of the brief: The brief gave artists a lot of freedom to create their own stuff. The most difficult part for me was to simplifying all the details of the building and adding the light structure which means you have to figure it out how to fit everything inside the piece.
Favourite part of the brief: Having the chance to get involved in a project with other artists around the world. It was really cool to see how each person interpreted the landmarks according to their points of view and styles.


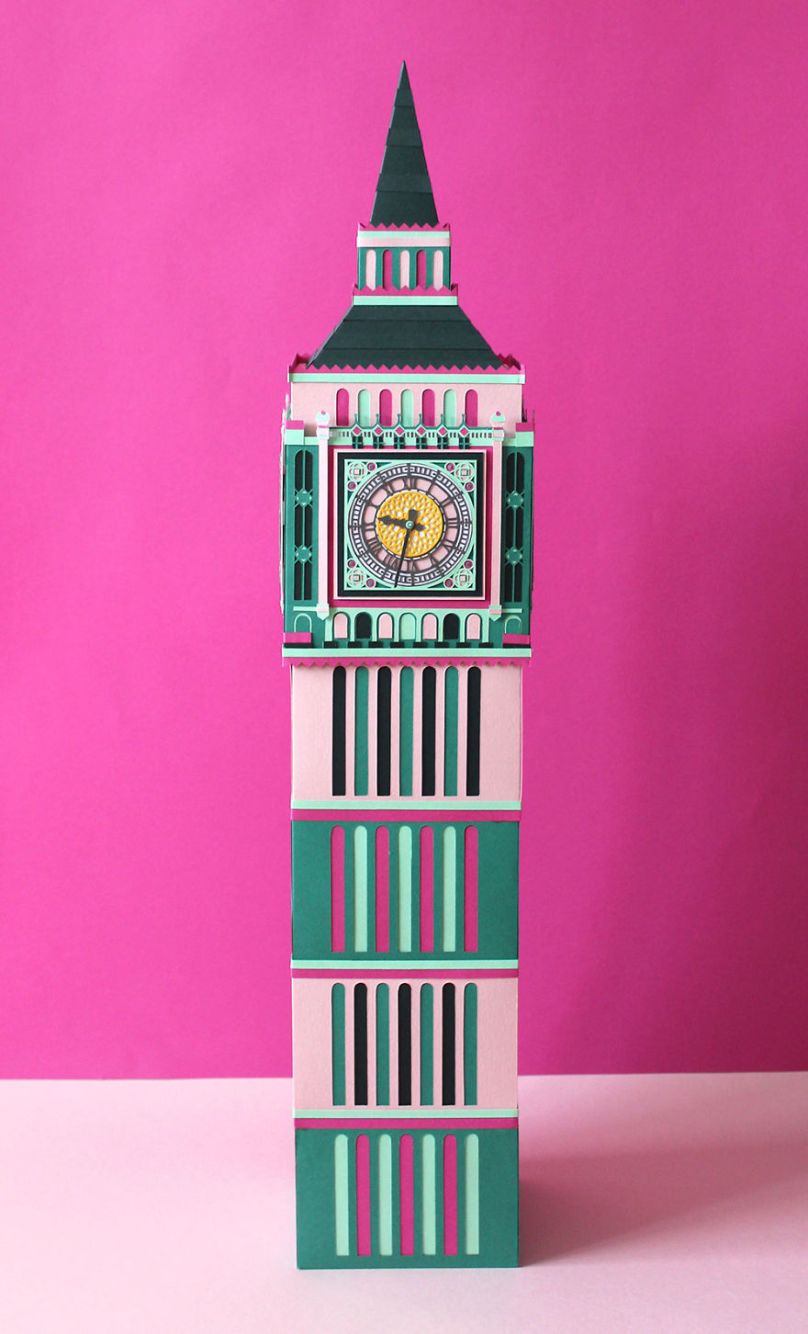
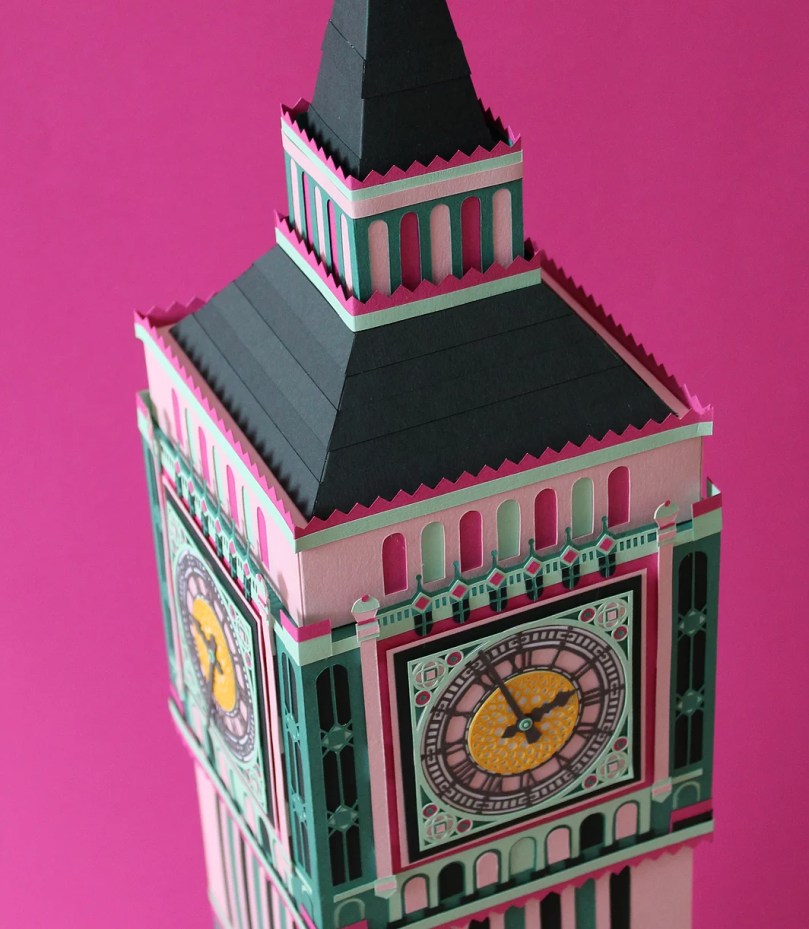
2. Samantha Quinn’s Big Ben (St. Stephen’s Tower)
Samantha Quinn chose the tower as something tall and distinctive, and it’s one of my favourite as it’s such a wonderful reimagining of the tower’s colours. The design is so intricate too.
Tools: Swann Morton No 3 handle with 10A blades, metal ruler, pencil, UHU glue, tweezers, cutting mat.
Process: I began with lots of visual research. I examined lots of photographs to create rough sketches of the overall composition. Using my sketches I began to visualise my design digitally in Illustrator. Working digitally helped me to work out scale and select colours easily. Each layer of the design was then printed on to very thin paper and lightly spray mounted on to the reverse of the ‘colorplan’ stock. I opted for a vibrant colour palette of greens and pinks. Every element was cut by hand and carefully glued together. As the landmark has four faces each tiny piece had to be repeated.
Most challenging part of the brief: Sticking down all the tiny fiddly pieces, some pieces were so small that the glue had to applied using a pin head.
Favourite part of the brief: Having complete freedom from the wonderful client G.F Smith, it is very rare that there are so few limitations in a brief so it was a pleasure to explore their fabulous Colorplan range.
3. Hannah Miles’ Palm House (Kew Gardens)
Hannah wanted a green and leafy landmark, and what better than Kew! She commented on how it was full of plants from all over the world.
 Tools Used: Scalpel, precision tweezers, UHU glue, glue syringe, spray mount, florist wire, acrylic, cutting machine.
Process: I drew and designed all the shapes needed for each part working from reference images of the palm house, tree and plants that are in kew garden. After I printed out my templates at the right size to cut from and sent the petal templates to the cutting machine so it could produce the amount I needed. After hand shaping all the petals I started to build each tree and the plant bed. The pal, house itself is made up of glass like a green house so I used the acrylic as the centre and glued the papercuts of the frame to either side.
Most challenging part of the brief: The hardest part was the scale, the palm house is long but not very tall so it ended up being quite a miniature piece to work on which made it fiddly.
Favourite part of the brief: I enjoyed making the trees the most, I usually work in 2D so bringing together trees that would stand and be filled with petals like the cherry blossom was time consuming but I loved how they ended up.

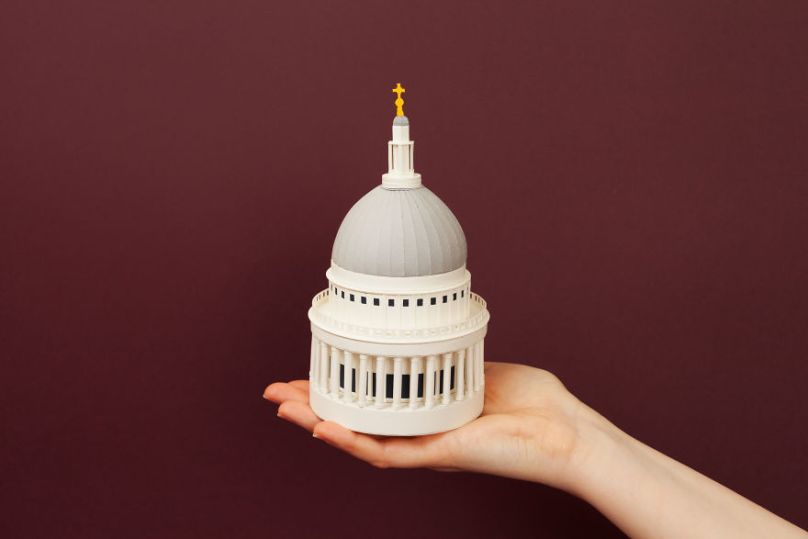
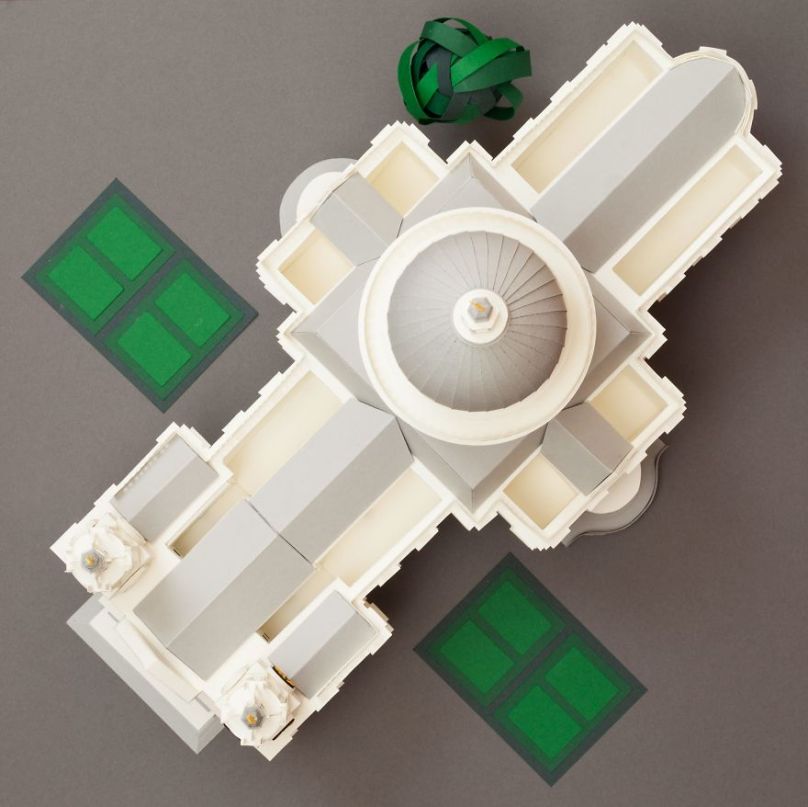
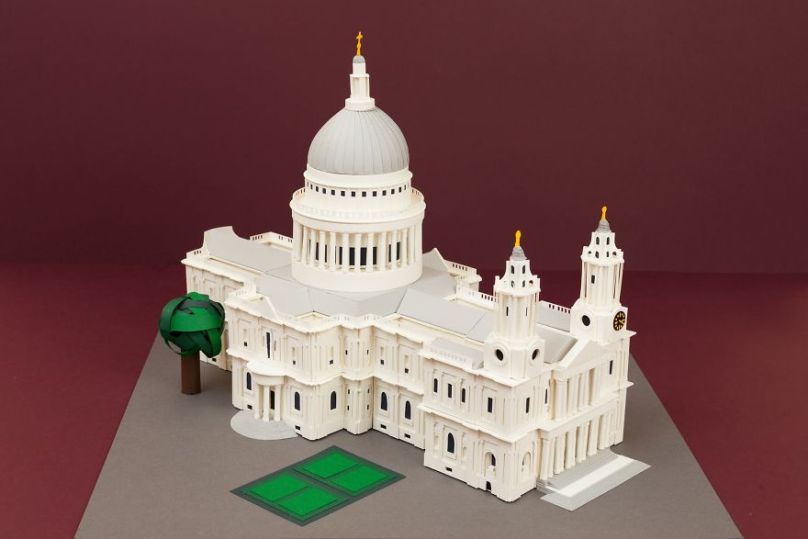
4. Julianna Szabo’s St Paul’s Cathedral
Julianna chose St Paul’s Cathedral because of all the interesting details she could apply to a 3D paper model.
Tools: X-Acto knife, 10A Swann-Morton blade, self-healing cutting mat, tweezer, UHU glue, PVA glue, pencil.
Process: I started with a deep research into each building, trying to find detailed photographs from all sides and as many angles as possible. I also looked for plan and elevation drawings that provided me the correct proportions. Then I deconstructed the buildings into blocks which I designed one-by-one on paper. After all the measurements and designs were done I made the building blocks out of the appropriate coloured paper without any decorations, only the basic shapes with the windows/doors cut out. When I reached the point when the building took shape, I started adding the tiny details to complete the blocks. I glued together the whole building only after all the elements were finished.
Most challenging part of the brief: I made the design to be able to add as much details in the given size as possible!
Favourite part of the brief: I love making 3D buildings so I enjoyed this project from beginning to end. The most rewarding part is when I can see what I imagined in my head at the beginning, taking shape at the end.
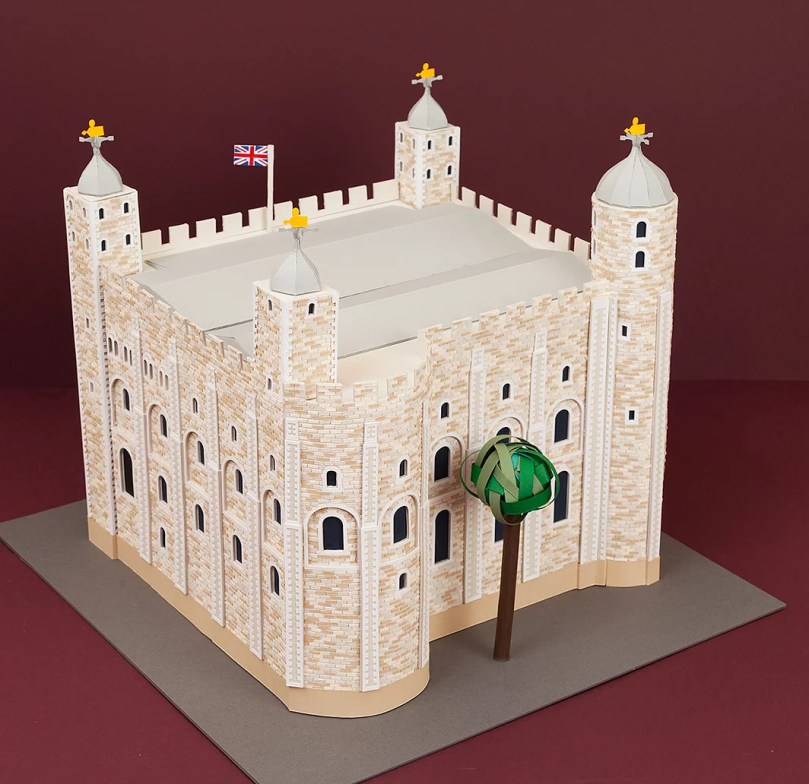
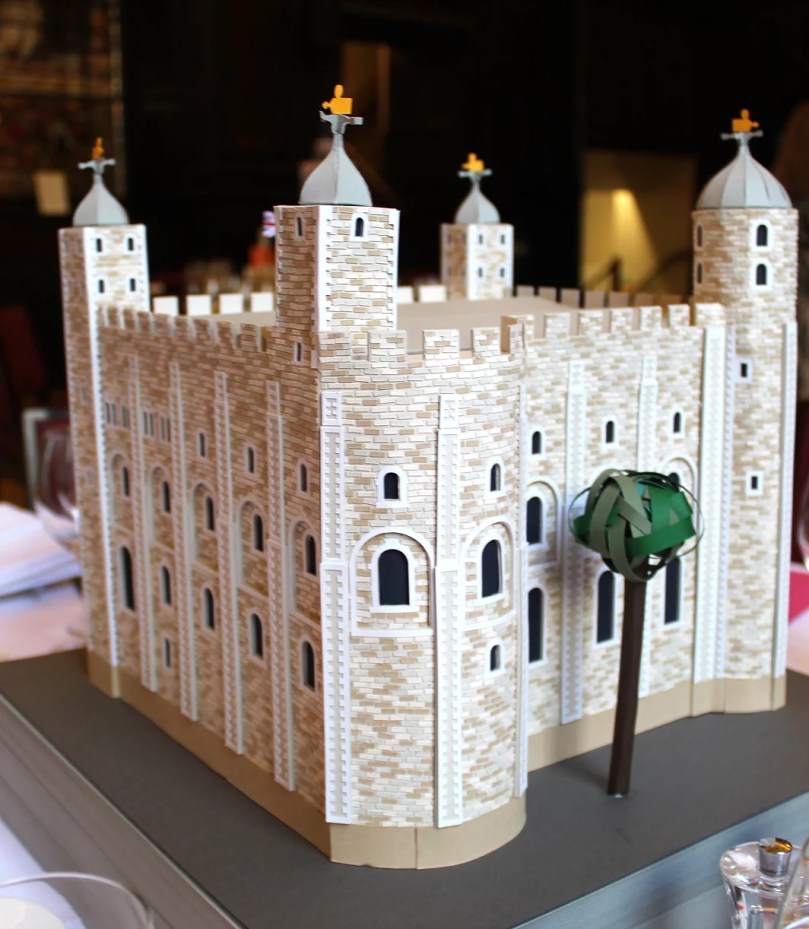
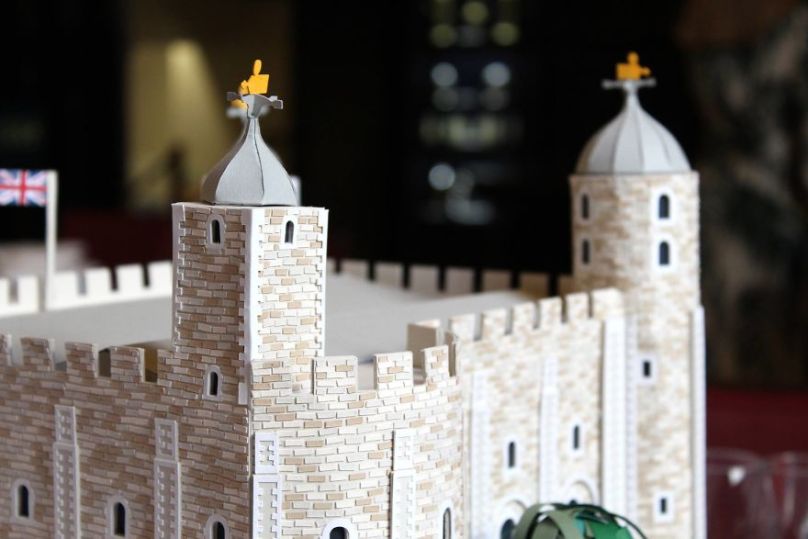
5. Julianna Szabo’s Tower of London
Another one with Julianna, you can see just how painstaking the process was in this video on her Instagram, where every brick is stuck on individually.
 Tools: X-Acto knife, 10A Swann-Morton blade, self-healing cutting mat, tweezer, UHU glue, PVA glue, pencil.
Process: I started with a deep research into each building, trying to find detailed photographs from all sides and as many angles as possible. I also looked for plan and elevation drawings that provided me the correct proportions. Then I deconstructed the buildings into blocks which I designed one-by-one on paper. After all the measurements and designs were done I made the building blocks out of the appropriate coloured paper without any decorations, only the basic shapes with the windows/doors cut out. When I reached the point when the building took shape, I started adding the tiny details to complete the blocks. I glued together the whole building only after all the elements were finished.
Most challenging part of the brief: I made the design to be able to add as much details in the given size as possible!
Favourite part of the brief: I love making 3D buildings so I enjoyed this project from beginning to end. The most rewarding part is when I can see what I imagined in my head at the beginning, taking shape at the end.


https://waterfallmagazine.com
What i do not understood is if truth be told how you are not really a lot more neatly-liked than you might be right now.
You’re very intelligent. You realize thus significantly when it comes to this matter, made me
in my view believe it from so many varied angles. Its like men and women aren’t interested except it’s one thing to accomplish with Lady gaga!
Your own stuffs nice. Always maintain it up!